Lesson Three

This subject was one of Jon Gnagy’s most popular television lessons. You can watch the lesson by clicking on the image to the left.
R.F.D. America
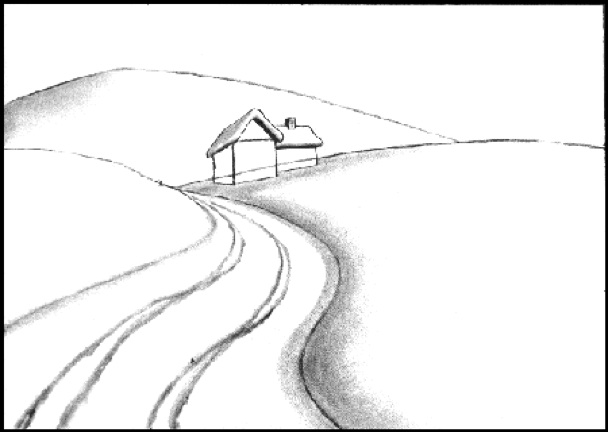
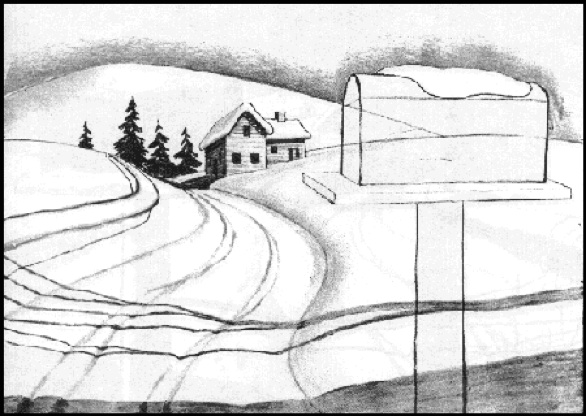
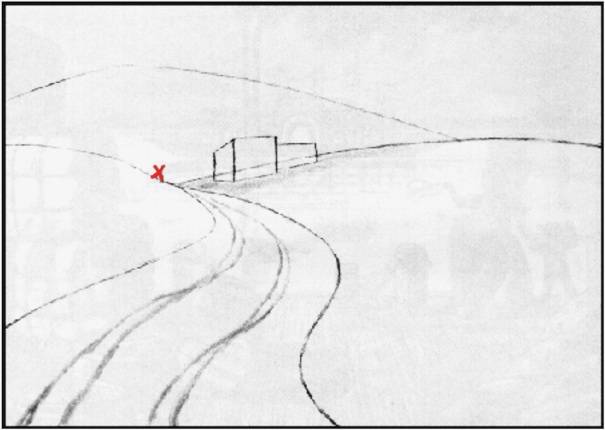
Draw the roadway and the distant hill in light outlinea. At the far end of the roadway, draw a cube with sharp perspective in one side converging toward point x. Draw a square the right side to make a section of a building. Slant the bottom edges of the building to follow the slopes of the hill. With a paper stomp rubbed in gray chalk, draw ruts in the snow. Keep them narrow in the distance and wider in the foreground. Let's have the light come from the upper right, so tone the left slope of the hill on which the house sits.
In toning and shading the edge of a snow bank, start with the lightest gray chalk. Put more pressure on one end of the chalk so that you automatically get the soft blended effect of the rounded snow forms. If both edges of the stroke remain sharp, it won't look like snow. You can also use a clean stomp and cleansing tissue for softening the blended surface even more. Remember the tone should blend from gray to pure white. Practice on a separate sheet.
Draw a triangular shape at the top of the front plane of the cube to make the end of the building roof. Draw the thick blanket of snow on top of this. Add a roof to the other section. Use the paper stomp dipped in light gray chalk for some shading on the left side of the roof and the underside of the overhanging eave. Use the same gray chalk for toning the left side of the distant hill. Draw the cube form of the chimney with the pencil and make a dark accent under each eave. Tone the side of the road that turns away from the light by placing the chalk on its side and exert more pressure on one end of it. Blend the right edge of the road softly with cleansing tissue. Use the stomp in gray chalk to cast a shadow on the right hand ditch and soften the line of the opposite ditch.
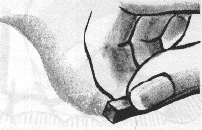
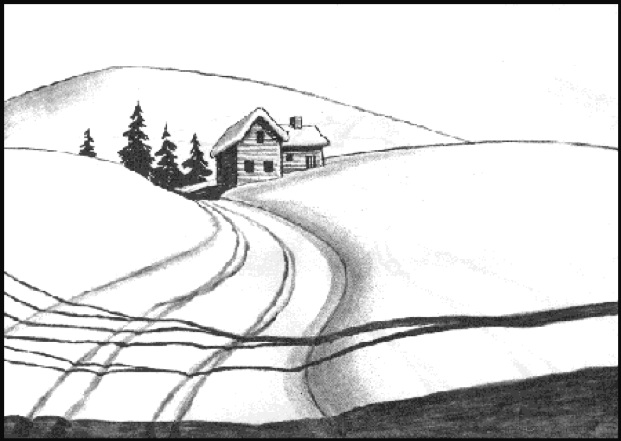
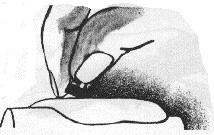
Shade the left side of the building with the dark gray chalk. Trim the end of the chalk to a small chisel point on the sandpaper. See small sketch above. With the dark gray chalk cast a shadow from the building, following down the slope, across the road and into the ruts. Draw the boards on the front surfaces of the building with the light gray chalk. Draw the rectangular windows and doors then put another dark accent under the eaves with the carbon pencil. With the dark gray challc cast the tree shadows across the front of the picture, down the slope into the ruts and up the opposite slope, each stroke growing narrower toward the left. Also make a broad Qst shadow across the front of the picture. Blend with the tip of the paper stomp and darken the ruts in the shadow with a pencil. Draw several pine trees beyond the house, starting with vertical lines and sloping the branches down in shaggy, triangular shapes.
The cast shadow across the snow bank and the ruts of the road can be very convincing if you bear in mind one important principle. The main thing to remember is that the cast shadow hugs the surface of the forms, and these forms are very much like a group of cylinders Iying side by side. So wrap your strokes part way around each form and make them drop down into the crevices and then curve them up over the bulge of each ridge.

Start the mailbox by drawing a long cube form over-lapping the hills and sky. Round off the top of the box like a loaf of bread and put a small irregular blanket of snow on top by drawing an outline with the carbon pencil. Draw a rectangular cube for the board that the box rests on. Keep it flat by showing the edge but very little of the top surface. The post is a cylinder form but at this stage just outline the two edges. Tone in the sky just above the mailbox with a short piece of the light gray chalk laid on its side and lightly follow the outline at the top of the box and the hill. Draw the hedge at the left with the carbon pencil, making it appear to be a long curved cube, following the contour of the hill. Soften the edges of the snow blanket on the hedge with the paper stomp.
Before toning in the overall sky it is important to bring the tone along the edge of the objects that meet the sky. A square chalk held tightly between the thumb and forefinger can be used to start the sky tone with a clean sharp edge. Give more pressure toward the one end of the chalk as shown in the accompanying sketch. After the entire edge is cleanly defined, then you may tone the remainder of the sky by holding the chalk in its middle.
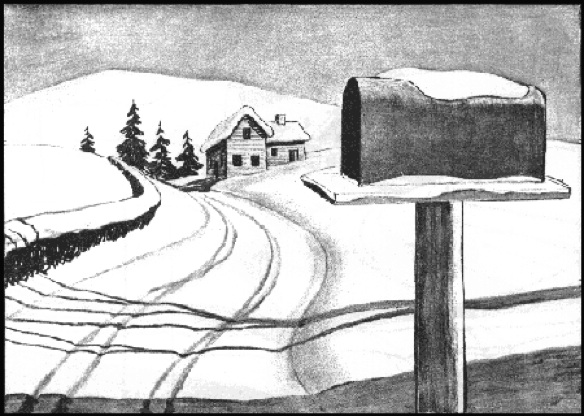
With the light gray chalk on its side, finish toning the sky, pressing heavier at the top and left of the sky for an overcast feeling. Draw the stems of the hedge with the carbon pencil. Erase the lines of the hill that show through the mailbox with a kneaded eraser. Tone the front of the mailbox with the light and the dark gray chalk. Draw an irregular edge with the pencil on the board beneath the box to indicate the snow blanket. Use the kneaded eraser to remove the outlines showing through the snow and raise the snow part way up from the platform against the edge of the mailbox. Tone the board light gray, erase the tree shadows from inside the post and tone it with the light gray chalk, leaving a highlight along the right side. Shade the left end of the box with carbon pencil.
The best way to get the effect of a mound of snow resting on top of an object is to draw the object in outline, then draw the marshmallow-like form of the snow. Make it hug the form. Then tone the object that the snow is resting on. Use the paper stomp dipped in light gray chalk and tone the under edges of the lump of snow to get the effect of roundness. Tuck the cast shadow under the edges with a pencil.
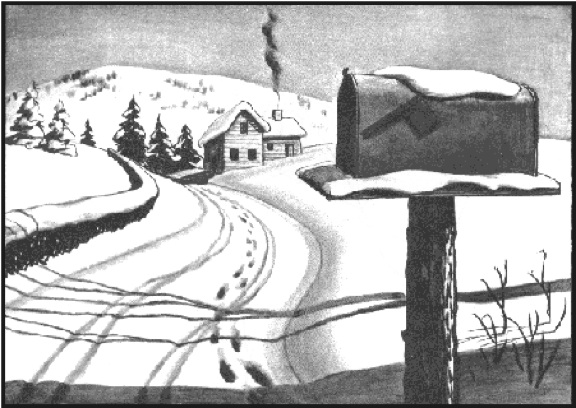
Cast a light shadow from the mailbox on the platform with the carbon pencil and small shadows under the snow on both the top of the box and the platform. Indicate some wood grain on the platform edge. Shade the left side of the post with the black chalk and with the carbon pencil indicate texture on the post. Cast the shadow from the platform part way down on the post. Add thickness to the snow on box and board by shading with the paper stomp dipped in light gray chalk. Outline the ends of the box heavily. Draw and tone the flag with the carbon pencil. With the paper stomp draw the smoke and dab in the footprints, making them larger as they come forward. Draw triangular blobs one over the other for two more pine trees, shading the left and under side of each with the carbon pencil. Put snow on the distant trees and draw the weeds in foreground.
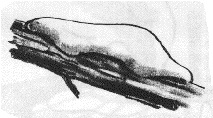
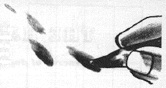
Here's the secret for making footprints in the deep snow. Dab the paper stomp into some light gray chalk and start right close in the foreground with the biggest dents. Give the stomp a slight twirl on each footprint to get the effect of a depression. Don't refill the stomp but keep on going back into the picture, making each print smaller and more faint in tone. Refill the stomp with a darker gray and put another dab in the bottom of each dent.
CONGRATULATIONS!
YOU HAVE COMPLETED YOUR FIRST DRAWING
USING JON GNAGY’S INSTRUCTION.
This subject was one of Jon Gnagy’s most popular television lessons. You can watch the lesson by clicking on the image to the left.

Jon Gnagy kits are still available, and you can find them on-line by clicking on the image to the right.